
|
You can find a lot of lens cleaning instructions on the Web. Why another one?
In my opinion a lot of lens cleaning overkill is published. I saw videos on youtube where they wear rubber gloves during the cleaning of a lens' front element! Besides, some manufacturers offer expensive tools for lens cleaning.
I have been cleaning my lenses for many years in an easy and inexpensive way and I have always been satisfied with the results. Remember: I love to shoot into the sun, which requires a perfectly clean front element!
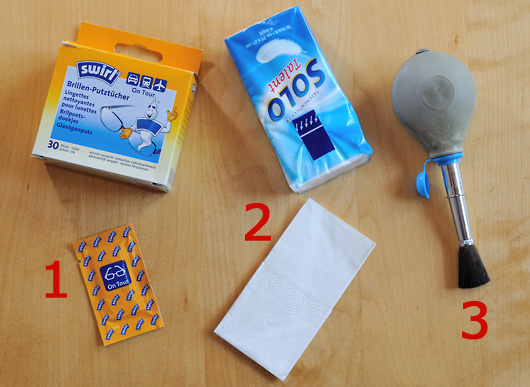
For cleaning a lens front or rear element or a filter I need three tools: a wet lens cleaning tissue, an unperfumed soft tissue (or soft toilet paper) and my lens blower brush.
Important:
I found notable differences in quality between the numerous brands of lens cleaning tissues. Important characteristics are the softness of the cloth and the amount of alcohol that was used. Here in Germany I prefer those from "Swirl". Check it out yourself for your country.
|
|
|
My cleaning procedure consists of three steps:
|
|
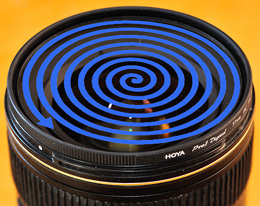
Always wipe spiral-shaped from the middle to the outside! |
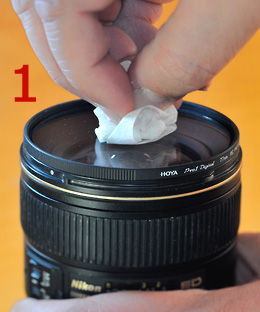
Step 1:
I crumple the lens cleaning tissue between my fingers. Then I clean the lens by moving the tissue spirally from the middle to the outside. Fingerprints and such things should have gone now (if not, repeat this step). But typically there remains a thin layer of cleaning liquid. Wait a moment, before you proceed to step 2!
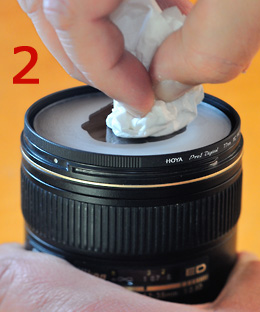
Step 2:
I breathe onto the lens and then I wipe the crumpled soft tissue over the lens in the same way as in step 1. The lens should be perfectly clean now, but there will remain some dust from the soft tissue.
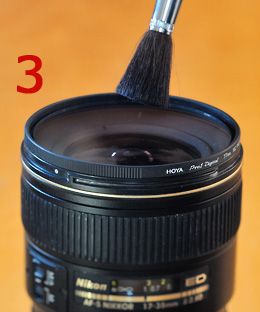
Step 3:
I blow away the dust with the lens blower brush. That's it!
I clean my lenses and filters everywhere - at home and in the field - whenever necessary.
At home, I have another option for cleaning very dirty filters (e.g. with a salt coating after a stormy day at the seaside):
First I swill it with warm water. Then I put some drops of washing-up liquid on the glass and clean it carefully with my fingertips. Finally I swill it again very thoroughly with warm water. The filter needs about one day to dry. I put it on a soft tissue for that and turn it a few times. At last I carry out steps 2 and 3 as described above.
It is a good idea to avoid lens cleanings by trying to keep your lenses clean. Some thoughts about that...
|
|
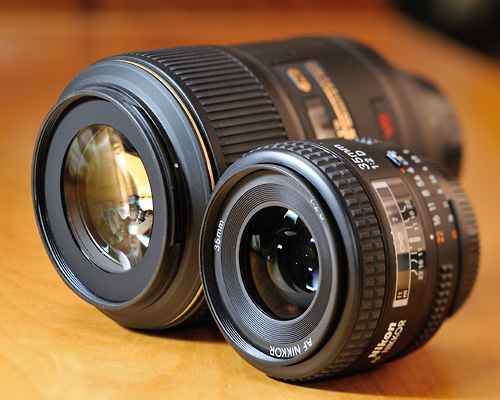
AF-S Micro-Nikkor 105mm f/2.8 and AF Nikkor 35mm f/2.8: using these lenses in the rain without a hood is foolish - in a moment you will have raindrops on the front element. |
|
|
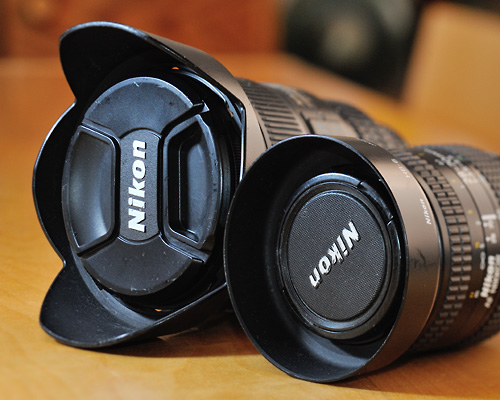
AF-S Nikkor 17-35mm f/2.8 and AF Nikkor 28-70mm f/3.5-4.5: despite the mounted hood, it is no problem to remove or to put on the cap. |
|
|
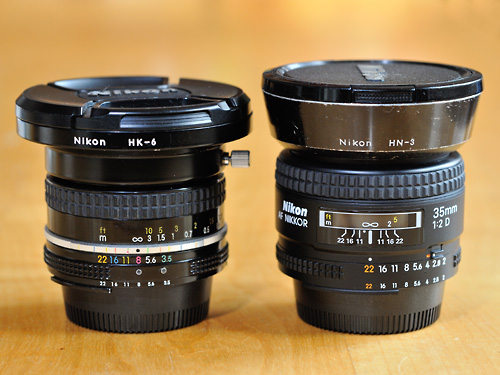
Nikkor 20mm f/3.5 with HK-6 Hood and AF Nikkor 35mm f/2 with HN-3 hood: a 77mm or a 72mm cap respectively fits perfectly into the front of the hood! |
In many of his lens reviews the southern Californian Ken Rockwell recommends to leave the hood at home. Examples are the AF 35mm f/2 or the AF-S 105mm f/2.8 VR. Maybe, he is right in terms of the need for a sun shade, for which hoods are intended. Perhaps Albert Hammond was also right when he sang "It never rains in southern California". But what I can say for sure is that it often rains in northern Europe and that it is stupid to leave the hood at home when you are photographing in the rain!
Rain drops on the front element of your lens decrease the image quality significantly. Thus you have to clean it immediately. But a lens hood is a good shelter against rain drops. The longer the focal length the better it is. But even for wide angle lenses like the AF-S 17-35mm it is true in rainy weather: it is better to go with hood than without!
If I have enough space in my bag I prefer to have the hoods mounted on my lenses. That saves time when I change a lens. And for longer lenses (such as the AF-S 105mm f/2.8 or the 80-200mm f/2.8) the front element is perfectly protected in this way, thus I do not need the front cap. For wide angle lenses I use a cap in addition to the hood. Otherwise there is the risk that the front element of the lens gets in touch with the soft material of the bag, which may leave marks that would have to be cleaned. Removing and attaching the lens cap while the hood is mounted is no problem for most wide angle lenses with a bayonet-mount hood. Examples in my lens line are the AF-S 17-35mm or the AF 28-70mm f/3.5-4.5. For other hoods you can use caps on the front of the hood. For example: a 72mm cap perfectly fits into the wide angle screw-in hoods HN-1, HN-2 and HN-3. For the slip-on hoods HK-2 (24mm f/2) or HK-6 (20mm f/3.5) you can use a 77mm cap.
My AF-S 17-35mm is my most used lens. Due to its large front diameter and its short hood there is a permanent danger of something touching the front element more or less heftily. Therefore I almost always have a UV filter mounted on this lens as a protection.
Another type of critical lenses are those with a built-in hood, especially if it is not lockable. In my lens line it is the AF 180mm f/2.8, which therefore has a UV filter mounted all the time!
But in critical environments - such as at the seaside on a windy day - I use protection filters on every lens.